The high-front Hood
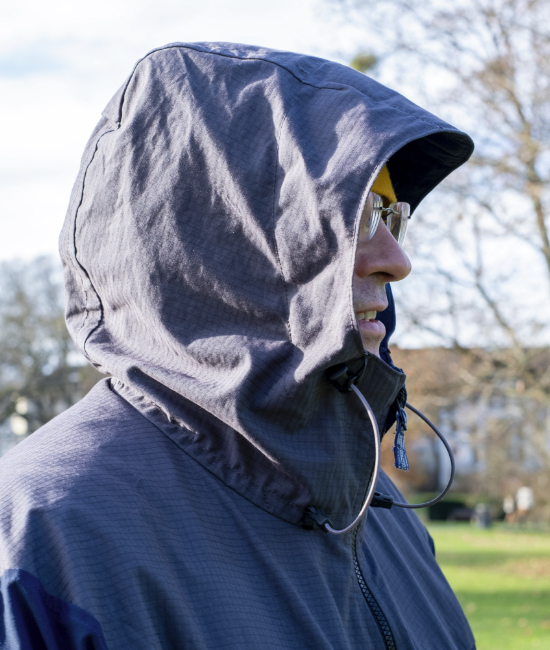
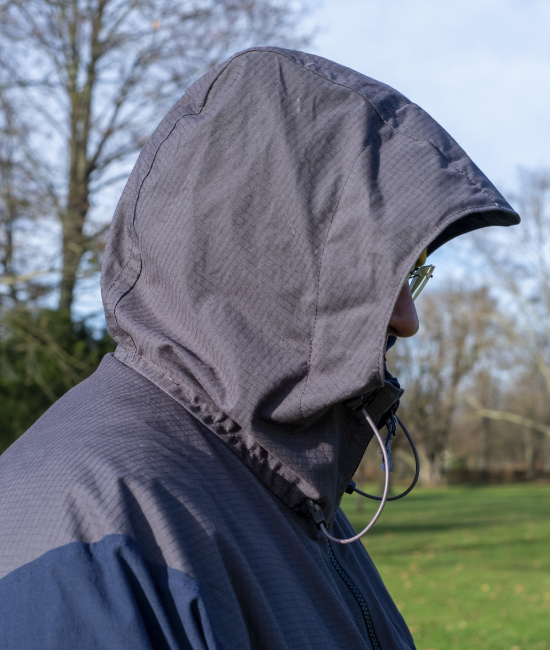
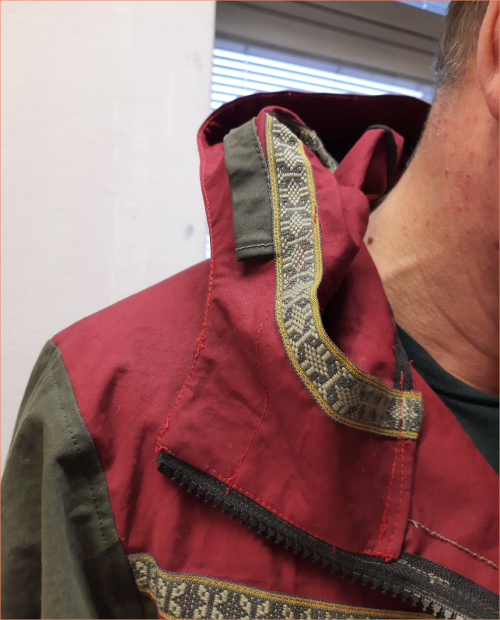
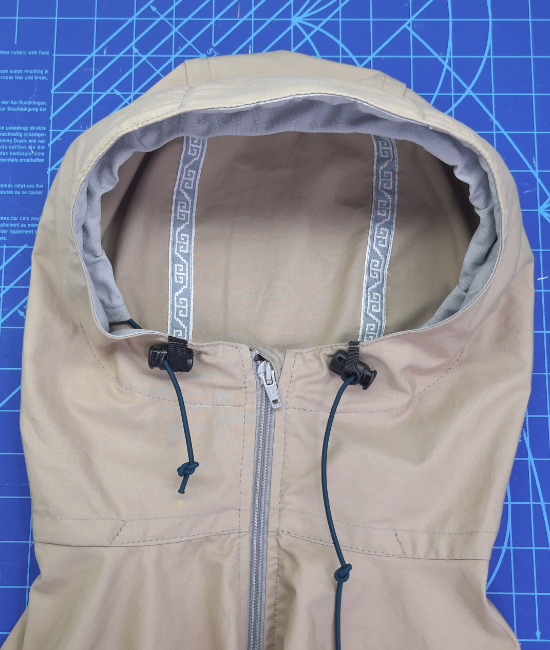
The hood 2 pattern is the higher version and this is the one displayed in the photos. It ends below the mouth depending on your neck height
by Birgit
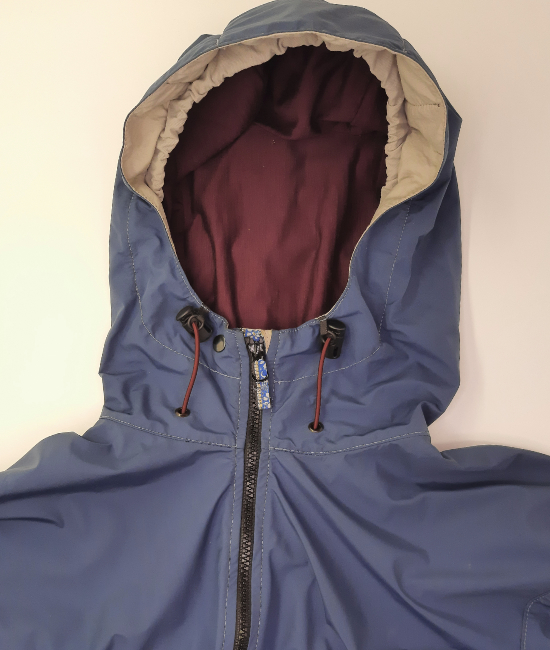
The brimmed hood is also called the ‘Super-hood’ among the outdoor community members. It has a storm brim, free visibility and room for a beanie & neck gaiter. The form of the hood does not necessarily need a tightener in the back as it stays and moves with the head for free visibility. The brim is wide and when worn down, it gives a very good high back protection.
The hood 2 pattern is the higher version and this is the one displayed in the photos. It ends below the mouth depending on your neck height
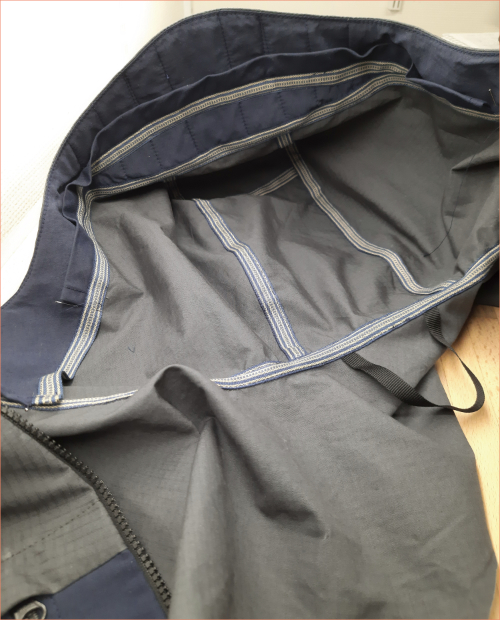
- No lining
- Very good and easy-to-use performance during your adventure
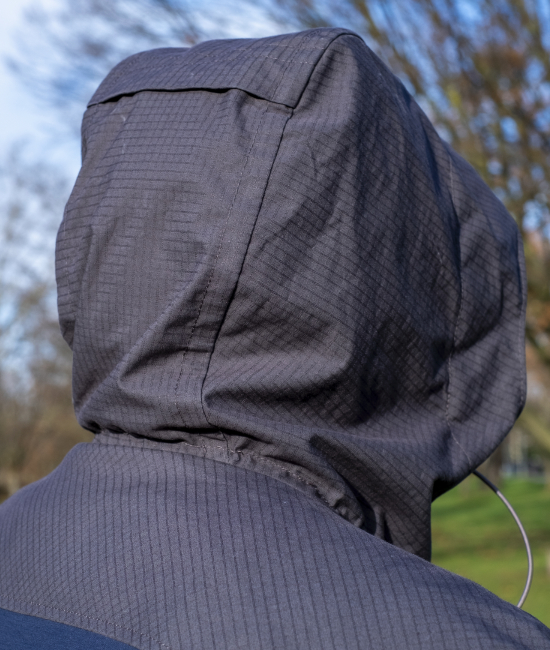
- Unique sewing technique, as the main hood piece is cut on fold and the two hood seams end in dart points
- Can be added to any men’s jacket or anorak pattern
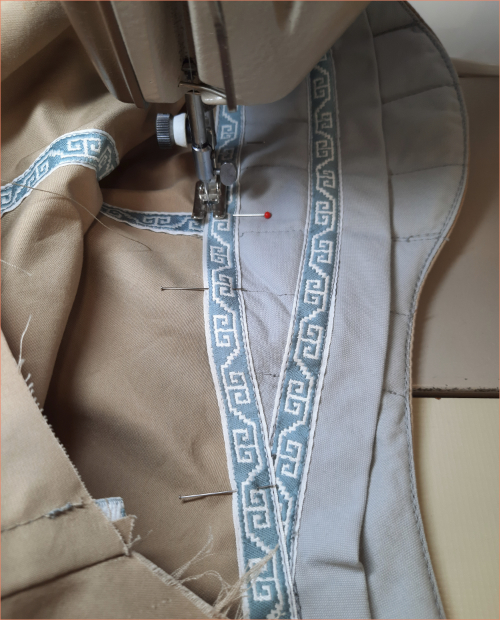
- Use a nice looking decorative ribbon 10 mm wide to cover the hood seams and facing edges
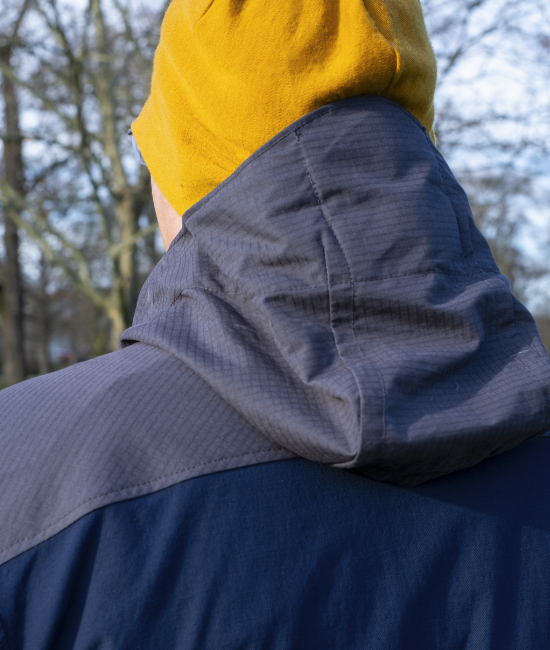
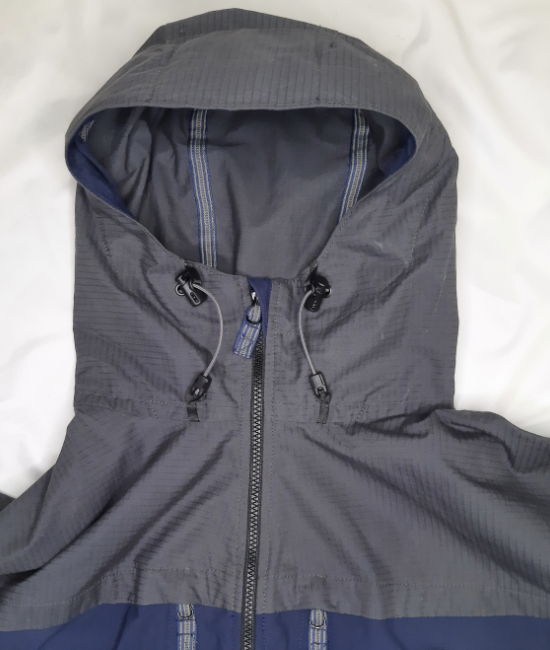
The hood 1 pattern is the lower version. It ends mid front neck.
Any kind of not too heavy outdoor fabric will work for this unlined hood. Non-stretch fabrics work best but fabrics with a light 2-way hand-stretch will work very nicely too.
I used the EtaProof/Ventile Ripstop for the hood and yoke as it gives the jacket a different look.
EtaProof/Ventile fabrics are my favorite, because of the breathability, feel and comfort of this fabric. Of course you can choose all kinds of other outdoor fabrics. Neoshell would make the hood waterproof and protect you against the more wet elements.
Best is to use a thin non-stretch fabric such as the Supplex Nylon, Cotton or Supplex/Cordura for the facing. Even when you use a 2-way stretch as your main hood fabric, stay with a non-stretch fabric for your facing. It gives your hood edge the stability you need to be protected when the ruff weather elements hit you.
Apply a thin Jersey iron-on interfacing. See the Interfacings Guide on the AskTailorBirgit pages.
The cord-tube piece is cut in bias, as it lays smooth and flat around the inside curve, and against your face. Use a soft fabric.
I used a 3D mesh (3mm thick). But of course you can also use Neoprene with or without jersey cover (2-3 mm thick) or similar soft support fabrics.
- Grommets (Ø5 mm) & Sew free or Heat Transfer Vinyl (HTV)
- Grosgrain ribbon or decorative ribbon (10-15 mm wide)
- Stretch cord (Ø 3 mm)
- 2 Cord locks or
- optional: 2 rings (Ø 6 mm), ribbon (5 mm wide) & 2cord locks
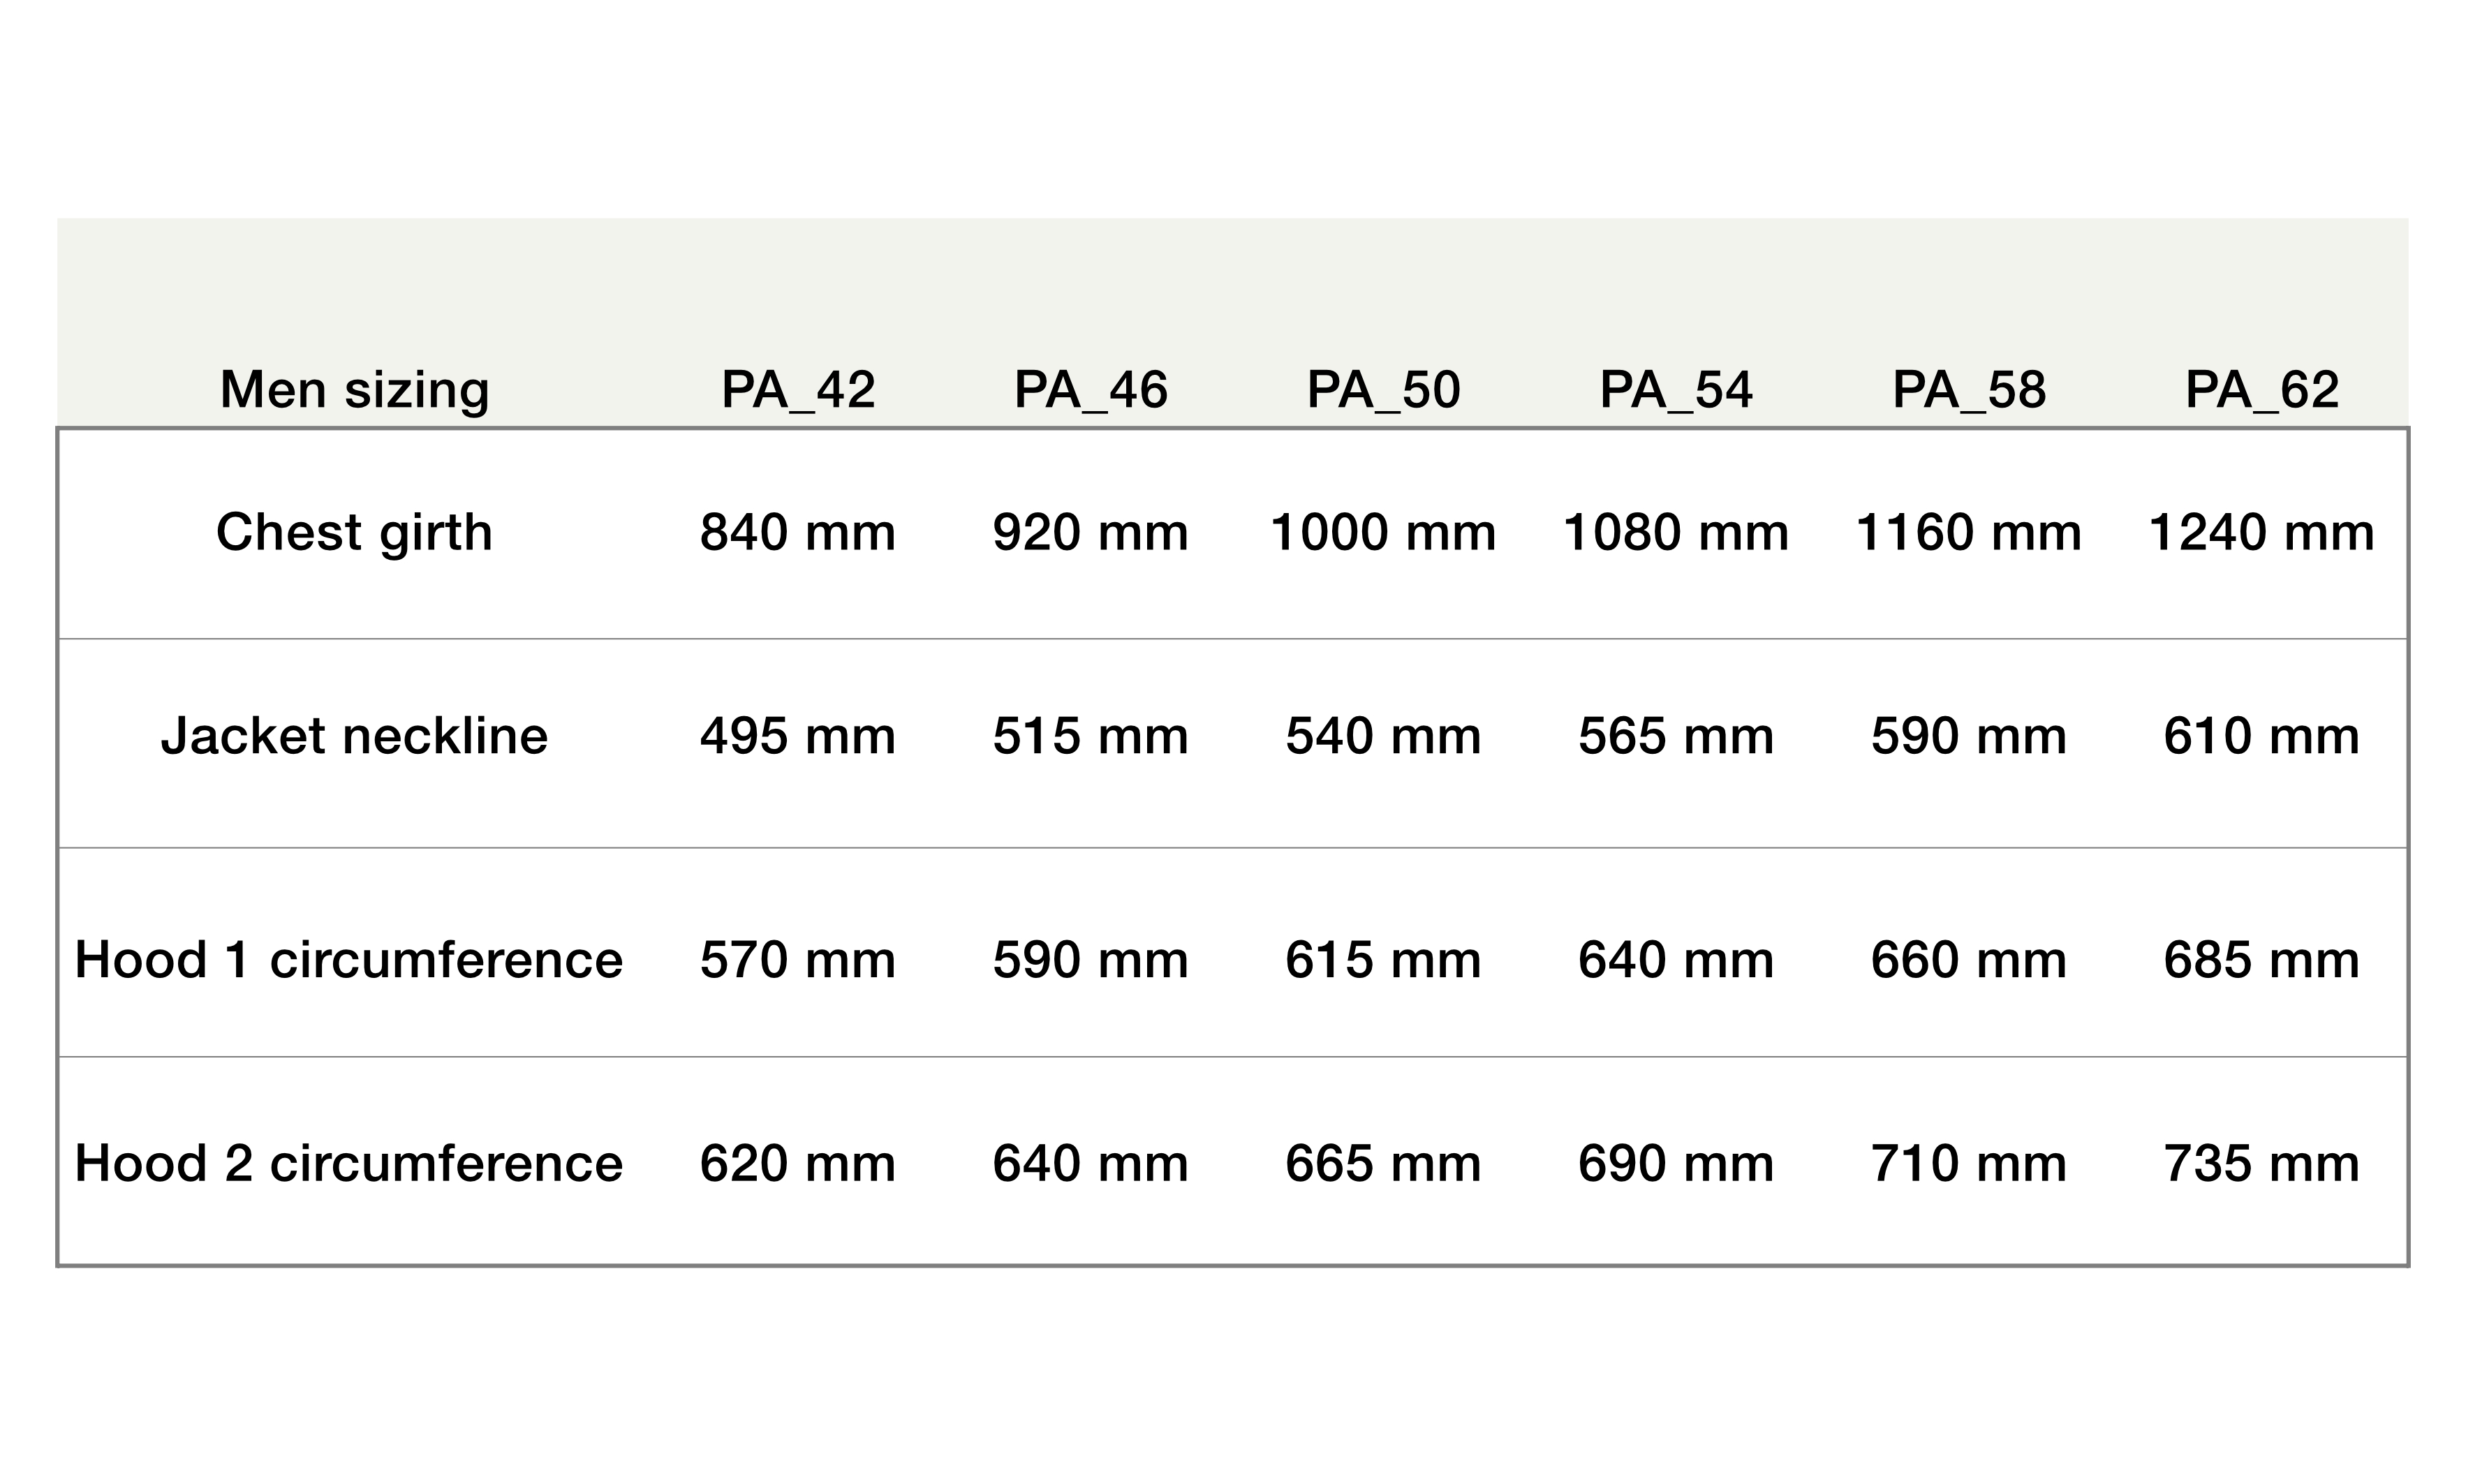
The hood sizing follows the men's chest girth: 84-124 cm (33-49’’).
Choose between six different sizes according to your chest girth. The hood circumference is measured at the top edge of the zipper around the neck.
You might need to adapt the neckline of your jacket or anorak pattern to the hood neckline. It is important that you check the neckline before you cut out the front and back pieces of your jacket.
In most cases, the neckline for men's jackets/anoraks need no adjustment. Nevertheless, a separate yoke piece and instructions guide you through possible needed adjustments. I will be making a short video for the AskTailorBirgit FB group (in the making).
I advise you to always make a quick mock to check-out the hood and size.
The sewing instructions for the hood are as always very detailed with lots of photos to guide you through step-by-step. The instructions include: adapting the jacket or anorak pattern, preparing the facing, sewing the hood, attaching it to the neckline and finally the finishing-up steps. Sewing tips help you to advance your sewing adventure.
The seams of the unlined hood are exposed and visible when the hood is worn down. Covering the seams and cutting edges of the hood, facing and neckline with a grosgrain or decorative ribbon give your hood a very nice individual looking finish.
I have used 10 and 15 mm wide ribbons and found the 10 mm wide ribbon work best. It is a lot easier to sew on and it looks nicer.
I always use the PatternAdventure Sew a zipper into a jacket - Workshop to sew the zipper into my jackets or anoraks.
After you have installed the front zipper, the hood sewing instructions continue and tell you how to finish the hood.
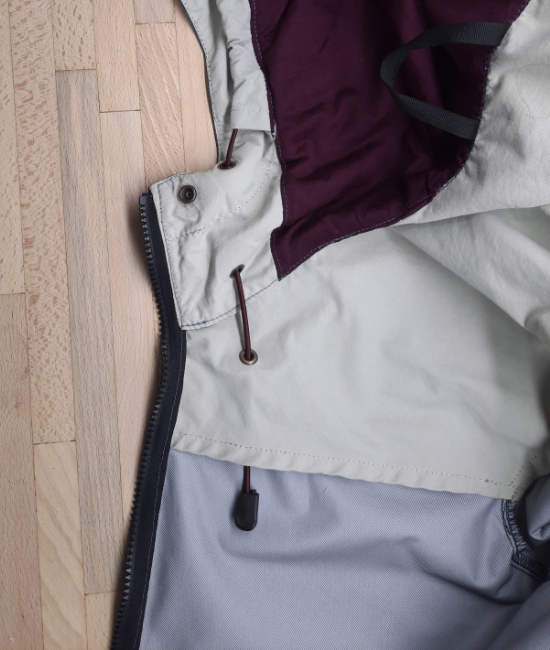
There are different ways to end the cord-ends. These are just examples to guide you in the right direction.
- a knot
- plastic parts for cord ends
- feed through a second grommet hole to the inside of your jacket
- feed through two more grommet holes to the inside of your jacket

by Birgit